Monday, April 25, 2011

Simple Table Treasure

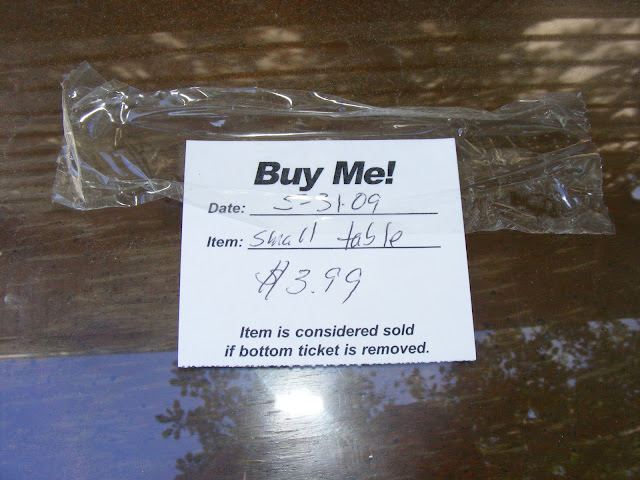
This is the story of my beloved Goodwill table.  :)  It was exactly what I was wishing for, a wooden table with a removable glass top.

I brought her home, sanded her a bit, then primed and spray painted her black.

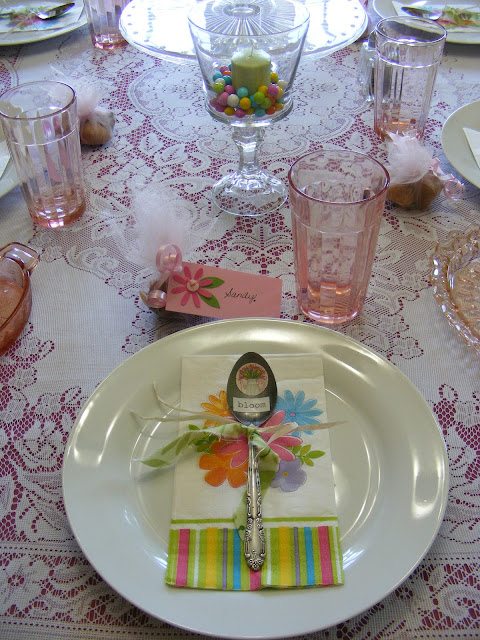
It was so fun to put some travel memorabilia under the glass.

And here she is!  The little dried flower at the bottom is a momento from our 25th anniversary trip to Santa Barbara, CA.  Sweet!  This is linked to Tip Junkie


Tip Junkie handmade projects

Thursday, April 21, 2011

Simply Delicious Chocolate Surprise Cake


Who doesn't LOVE chocolate cake? And cheesecake too?! Surprise Cake has a bit of both! So easy to make...here's how: Stir up a chocolate cake from any mix, following the package directions.


In a separate bowl, cream together: 8 oz. cream cheese, softened (I used low fat,) 1/2 cup sugar, and 1 egg.


Fill greased cake pans with 2/3 of the cake batter (I used 2 round ones to make 2 one layer cakes...a nice way to have one cake for home, and one to share with a friend). Spoon the cream cheese mixture over the batter in a random way, for a pretty pattern. Then spoon the remainder of the cake batter over the cheese filling. Bake at 350 til the top springs back when poked and a toothpick inserted near the middle comes out clean.


After a bit of cooling and removing from cake pan onto a pretty plate, serve slightly warm with a shake of powdered sugar over the cake and plate. Also great with a dollop of whipped cream. Must refrigerate remaining cake.


This cake was so easy, makes a pretty presentation, and is so so good. Very moist and not sickeningly sweet. Simply delicious! Enjoy.

I am linked to Tip Junkie

Tuesday, April 19, 2011

Eastery Eggs...(...as Tigger would say...)

I had the B.E.S.T. time today, making 'Eastery Eggs,' (as Tigger calls them!)
I started with raw eggs, made little holes in each end, and just about killed my cheeks/jaw blowing out the egg contents into the sink.

Yes.  Amen!

These were my tools of choice.  I made a hole in each end with the corsage pin, then gently twisted the little Philips head screwdriver in the holes.  Worked GREAT!  You use the pin, again, to 'stir' the yolk, making it more cooperative in coming out.

My neighbor friend, Carrie, came over and like little girls, we had fun coloring the eggs and then copying some fun ideas online to decorate them! 

Meet Chicken Little, Dotty, 70's Flower Child, the Bluebirds of Happiness, the Carrot Twins, and little Flower Power.


For some reason, Flower Power is one of my very favorites, altho I also love the birds, carrots, and chick.

Are you ready to have fun like you did when you were a girl?  Give these babies a try.  Come up with your own ideas or copy some online.  It didn't take long and doesn't have to be perfect.  And I now feel like Easter is around the corner.  On a more serious note...our family is reading about Jesus' last week of life before his crucifixion and resurrection from The Message each night after supper.  I can't wait to sing the powerful hymns and worship songs Sunday morning at church.  Easter is truly the most joyous holiday there is!!  He is risen!  He is risen, indeed.

Linked to Tip Junkie...my favorite blog!

Sunday, April 17, 2011

Garden Giddiness : )

Our first Southern Indiana spring is making me very happy...planting veggies in April is a wonderful new blessing down here!  In Chicago I needed to wait til mid May for most things.

Our Square Foot Garden...I love the tidiness of it.  Tiny Bibb lettuce plants in the first 2 squares, radishes in squares 3 and  5.  Onions with a few stray radishes in square 4...don't ask!  Beets are coming up in square 6, and squares 7&8 have okra seeds in them.  Hurry okra...I'm worrying about you!

After a cold, rainy Saturday we are having a warm, sunny Sunday.  So today I planted these three beauties, plus a red pepper plant and 3 yellow pepper plants.

Ok, so my favorite gardening tool right now...is an iced tea spoon! The soil is lightweight and loose, so this spoon is perfect for planting seeds.  :)

Green beans!  Our married daughter thinks fresh green beans are yucky and hairy.  John and I think they are heavenly.  :)


My fun new venture...cinder block gardening!  Learned this from a friend in Florida who's growing tomatoes this way, due to their poor soil.  These blocks were already a part of this flower bed, holding the dirt off the fence.  So we filled their holes with dirt and now they are the cozy new homes of some gladioli bulbs, morning glory seeds, African daisies, wildflowers, and aster seeds.  I can hardly wait to see how this goes!  Super easy to plant...no digging!

Bleeding Hearts beginning to bloom, Basket of Gold, Zinnias coming up, and my first pink Cala Lily bulb has poked through! 
 I truly do have some Garden Giddiness going on.  I love to go out 3 times a day to see what new seeds have emerged and to admire the tidiness of it all.  Do you have things growing now too?  Would love to hear about it!

Spring Blessings!
Donna
I am linked to Tip Junkie

Friday, April 15, 2011

Puff Pastries with Creme

I recently made this light dessert for my mother's 70th B-day lunch.  They couldn't have been easier!  And were soooo tasty, it took self control to only eat one or two.  Here's how to make them.
1 sheet of thawed Puff Pastry
3 ounces of softened cream cheese
1-2 T. powdered sugar (to taste)
splash of milk
fresh strawberries

Let your sheet of puff pastry dough thaw according to the package instructions.  I believe it says to thaw it on the counter for 40 minutes.

Unfold the pastry onto pastry cloth or piece of waxed paper.  Using a pizza cutter or sharp knife, cut the dough into 9 squares.  Place the squares on a baking sheet or baking stone, pierce with a fork, and bake according to the package directions.

When they are cooled, mix the softened cream cheese with 2T of powdered sugar, to taste.  Add a splash of milk to make it a nice spreadable consistency.  Spread each square with a dollop of the sweetened cream cheese.  Garnish with a clean, sliced strawberry (or wouldn't blueberries be good on this too?!)  

For presentation, I placed them on a serving plate and sprinkled powdered sugar over and around them.  These were light as a feather, not too sweet or rich, and the leftovers (stored in the refrigerator) made a perfect treat to go with my morning coffee for the next several mornings!  :)

I plan to make these again soon.  Let me know if you give them a try!

Spring Blessings!
Donna

I am linked to http://www.tipjunkie.com

Tuesday, April 12, 2011

~ Asparagus Tart ~

I've had some requests for the recipe of the Asparagus Tart that I made for my mother's b-day luncheon.  It was soooo easy, different, and tasty!  So here you go: 1 pie crust (I used a Pillsbury one this time), 2 eggs, 2/3 cup heavy whipping cream (I used 2/3 cup evaporated milk to save on fat/calories), 1/8 tsp. salt, 1/4 cup grated parmesan cheese, 1/4 teaspoon pepper.


I used the pie crust in its round shape, and just rolled up an edge all the way around.  The actual recipe (from Sandra Lee) says to roll it into a rectangle before creating an edge all around.  Or even better, put it in a tart pan if you have one.  Next, pierce the dough every few inches with a fork and bake at 450 for 8 minutes or until lightly browned.

Cut washed/trimmed asparagus pieces into thirds.  Arrange asparagus in rows on the crust.  Reduce oven temp to 375.  In a small bowl, whisk together the eggs, cream or milk, and salt.  pour over asparagus.  Sprinkle with the cheese and pepper.  Bake for 23-25 minutes or until lightly browned and set.  Remove from baking sheet.  Cool completely on a wire rack about an hour.  Cut into 2 inch serving pieces, and serve!

This is perfect for a brunch, lunch, or appetizer.  Very springy and colorful.  I think it would be tasty, also, to add bacon.

Enjoy!
Blessings,
Donna ~@~

Linked to http://www.dontwasteyourhomemaking.com/

Sunday, April 10, 2011

~ 20 Minute Door Decor ~

I recently saw some cute cone shaped door hangers at JoAnns.  They cost $9.99 and I didn't even want to pay 50% off for it.  So...I bought some inexpensive flowers to go in one, and decided to make my own.
I knew I needed a sturdy cone shape for starters.  My empty, clean Culvers cup worked just fine!  I cut off the bottom, then fashioned it into a cone shape and stapled the ends together.  They won't show.

This shows the Culvers cup down in the paper cone cover that I made next and I stuck the cup to the cone cover...I think I stapled it in the back....see below:

I wanted to use sheet music to be the cone cover.  The ones at JoAnns are more like a page from a book...either one would be great.  This is just a copy of a piece of sheet music.  I rolled it into a cone, making sure the cup could fit inside, then stapled it together in the back.  I had to cut some of the side of the paper off so it wouldn't wrap around and show in front.

Next I added some green grossgrain ribbon to the top, to add color and finish the edge.  I wasn't striving for perfection on this.  Then I chose 3 buttons, added coordinating embroidery thread to the holes, and glued them on.  Btw, I think I used double sided tape to stick the ribbon on...I can tell I was tired and didn't want to go to the fuss of doing it all 'just right!'
And there she is!  I added a pretty pink ribbon...stapling it to the back, ironing it, and tying it into a bow.  I have some white sticky tac behind the cone, keeping it from moving around too much on the door.  And I used more double sided tape here and there to make the cup stick more closely to the cone in the  front.  It's cheerful, cost me just about $1.50 out of pocket, and I used trash (the used cup) and materials I had at home.  Honestly I think mine is just as cute or cuter than the $9.99 one!  Hope you've enjoyed this little tutorial.  Thank you for stopping by!  I truly enjoy and appreciate each one of your visits and comments!  God Bless You!

I am linked to The DIY Showoff Linky Party
and to http://todayscreativeblog.net/ and http://www.dontwasteyourhomemaking.com/
Tip Junkie Linky Party
Elements Interiors 

Saturday, April 9, 2011

~ A Garden Luncheon For My Mom's 70th B-day ~

April 8, 1941, my mama was born in a cotton picker's shack in Oklahoma.  Her grandfather noticed after birth, that her umbilical cord had come untied, and saved her life by retying it!  So now, April 8, 2011, we celebrated my mom's 70th b-day.  The day dawned beautifully here in southern Indiana.

I had the joy of hosting a Garden Luncheon for mom and several friends.  One guest got sick that morning, so that's her empty spot on the right.  I made Garden Stakes out of old spoons and gladioli bulb place cards...you can see them better here.
It's always a joy to use my pink depression glassware for a ladies' party.  :)


Sandra Lee gave me the idea for the Charming Little Cakes.  Recipe is here.

Asparagus Tarts were very tasty and so easy!
Doesn't this little cake make you feel like a princess?

Pasta/Bean Salad

Cucumber Chicken Salad....soooo good!  Recipe is here.

My Mama...
Since this was a Garden Luncheon and since my mom is new in the area and is starting from scratch with new flower beds, each of the ladies brought her some perennials as gifts!  And I displayed photos of mom throughout her early years.
Puff Pastry and Creme Treats...couldn't be easier or tastier!  Recipe next week.

Mom with her gardening goodies, including a new trowel and a bar of handmade soap!

It's me and my mama.  Don't mind that I look hot (it was in the 80s that day!) and frizzled (my hair loves hates humidity!)  But I was happy that all had gone so well and mom had been celebrated!

My mother at age 17....oh to have been born in the 1940s when natural beauty seemed so easy and classy.

We ended mom's b-day with dinner at O'Charley's with my Dad, husband, and son.  Then my guys and I stopped by the Ohio River for the most beautiful sunset...love living near a river.
Ahhhhh...the end of a wonderful day.  With my handsome husband.   And knowing that my tomorrow was going to be free, free, FREE!!

Tuesday, April 5, 2011

A Garden Luncheon ~ Part 1

My sweet mama is turning 70 on Friday.She was born on April 8, 1941.
  Because we now live in the same town for the first time in 18 years, I am hosting a Garden Luncheon in her honor.  Fun!  I'm starting on the preparations today.  This morning I made lemon slice ice cubes to go in our drinks.

I am also making the table favors today.  Thanks to some brilliant gal on a blog which I cannot remember and could not find today, I decided to make old spoon garden stakes!  I found exactly 6 old but beautiful spoons at the flea market for .29 to .50 each.

I looked online for some free flower clip art.  Then decided to check the pretty, old calendars that I have been keeping for a craft.  Sure enough...the pictures on the back of the calendars, showing tiny examples of the pages inside, were the perfect size.

I used my circle punch to cut out pictures of pretty flowers.

Next, I coated the bowl of the spoon with a thin coating of Mod Podge.


Then placed the circle punched flowers and a printed tab of 'bloom' in the center of the spoon bowl.  I let it air dry for about a half hour, then coated the bowl of the spoon completely in Mod Podge again.  Let dry another half hour.

While those dried, I used pink tulle leftover from my niece's bridal shower 4 years ago to make 7x7 inch squares.  Inside each double square I placed 3 Gadioli bulbs, and tied the packet with pink curly ribbon.

I added a green fabric tie with some raffia ties to each spoon, and made a place card to go on the tulle packet of bulbs.  Hurray!  I like them!  Which is always a plus when you are making something for the first time.  :)  The spoons can be used in the ladies' flower beds or in an inside plant.  I plan coat the bowl of each spoon with a thin coating of polyurethane too, to make them weather proof.

 Check back later this week as I make more fun things for my mom's 70th b-day Garden Luncheon.  Thanks for popping by!  And mums the word....don't tell my mom about any of these surprises!  :)

I am linked to http://www.tipjunkie.com
and to http://www.remodelaholic.com 
07 08 09 10
Pin It button on image hover