Monday, September 26, 2011

Cute Carry All Tote from Sam's Club

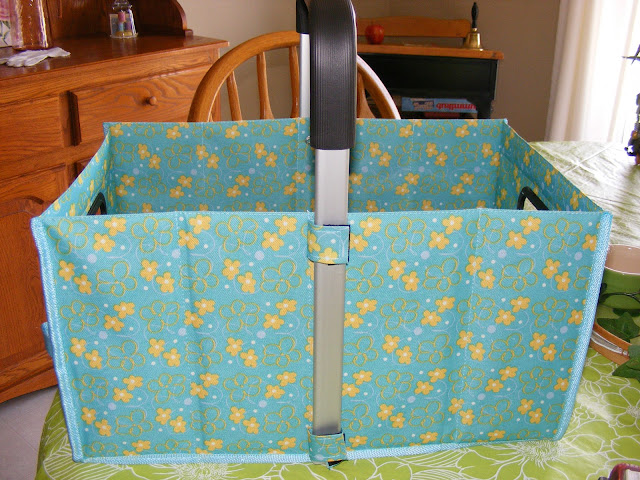
I get an allowance every month.  : )  I'm a stay-at-home-mom and home school teacher, so I don't have opportunity to make much 'mad money' but I do give myself a monthly allowance which I can spend on anything I want.  Not alot...$20 a month is plenty b/c we have other money set aside for clothes, shoes, outings, etc.  So being a simple girl that doesn't need alot to be happy, $20 is plenty.  At Sam's Club, I recently found the perfect thing to spend 1/2 of my allowance on.  The cutest Carry All Tote.  It folds up all small like this:


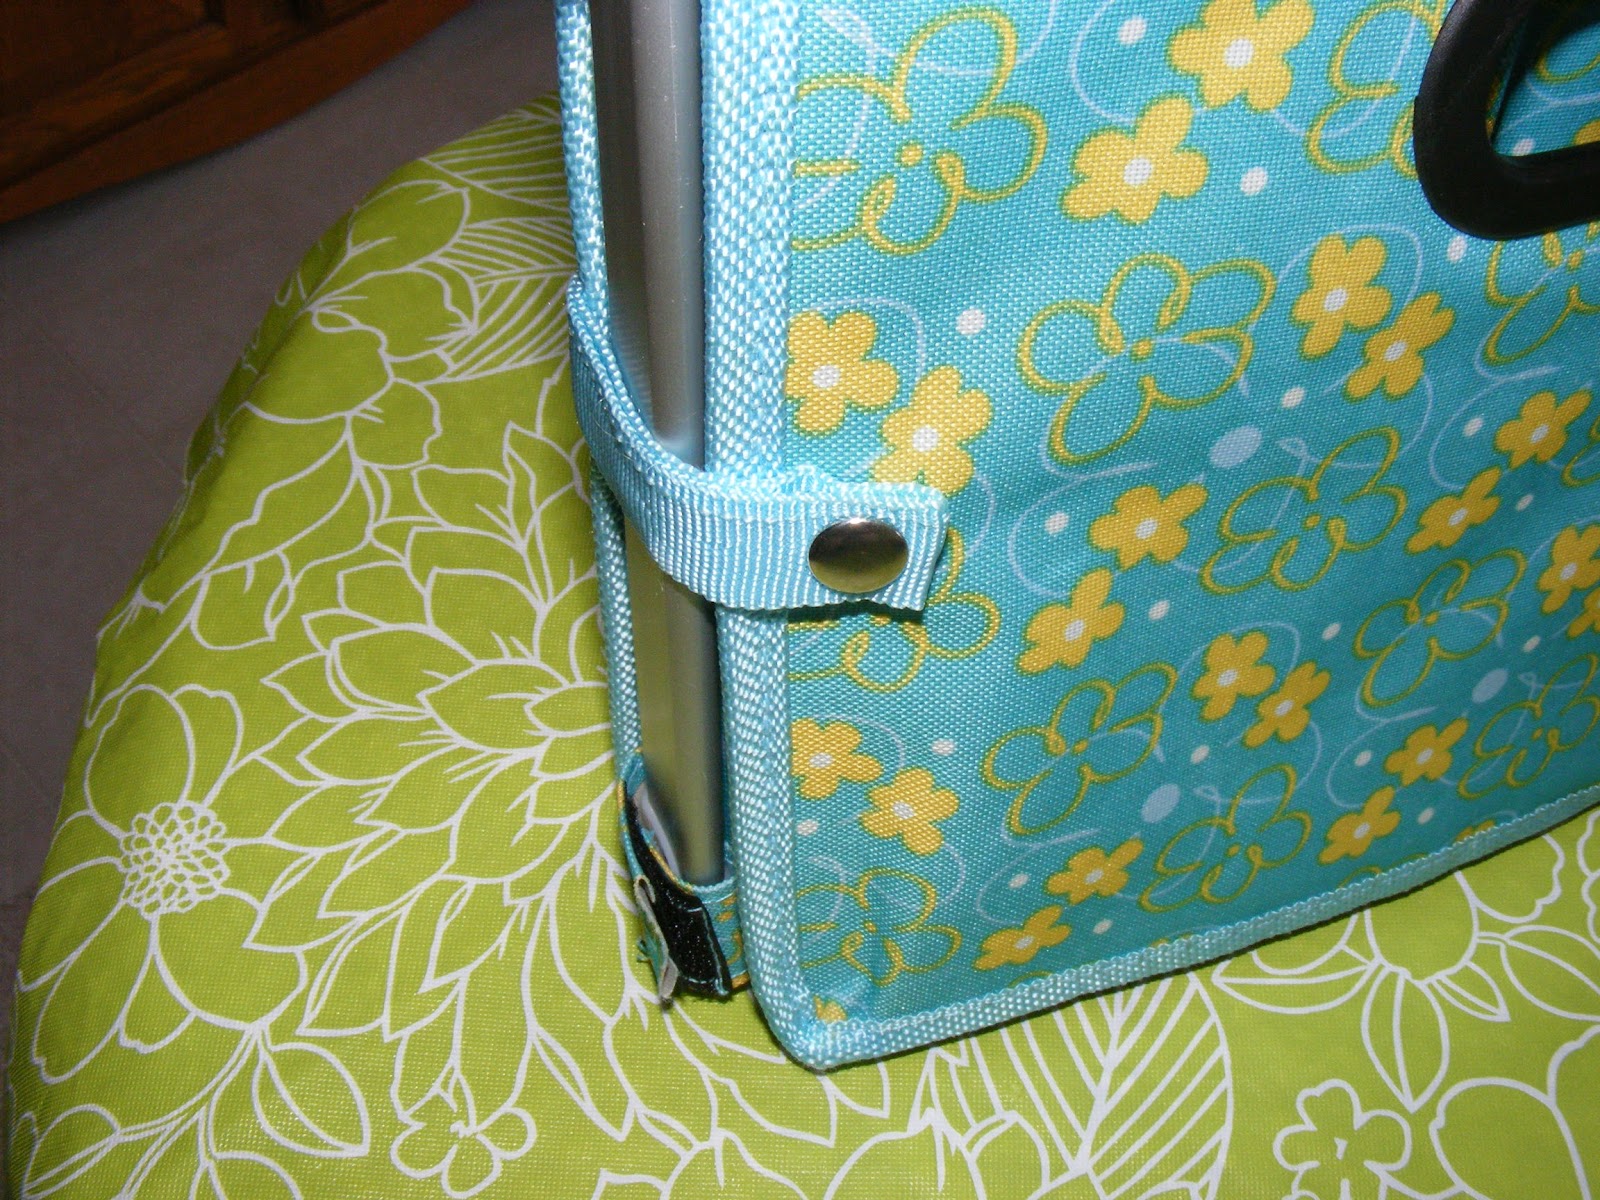
It is kept together for storage by these snaps.

The snaps undo...

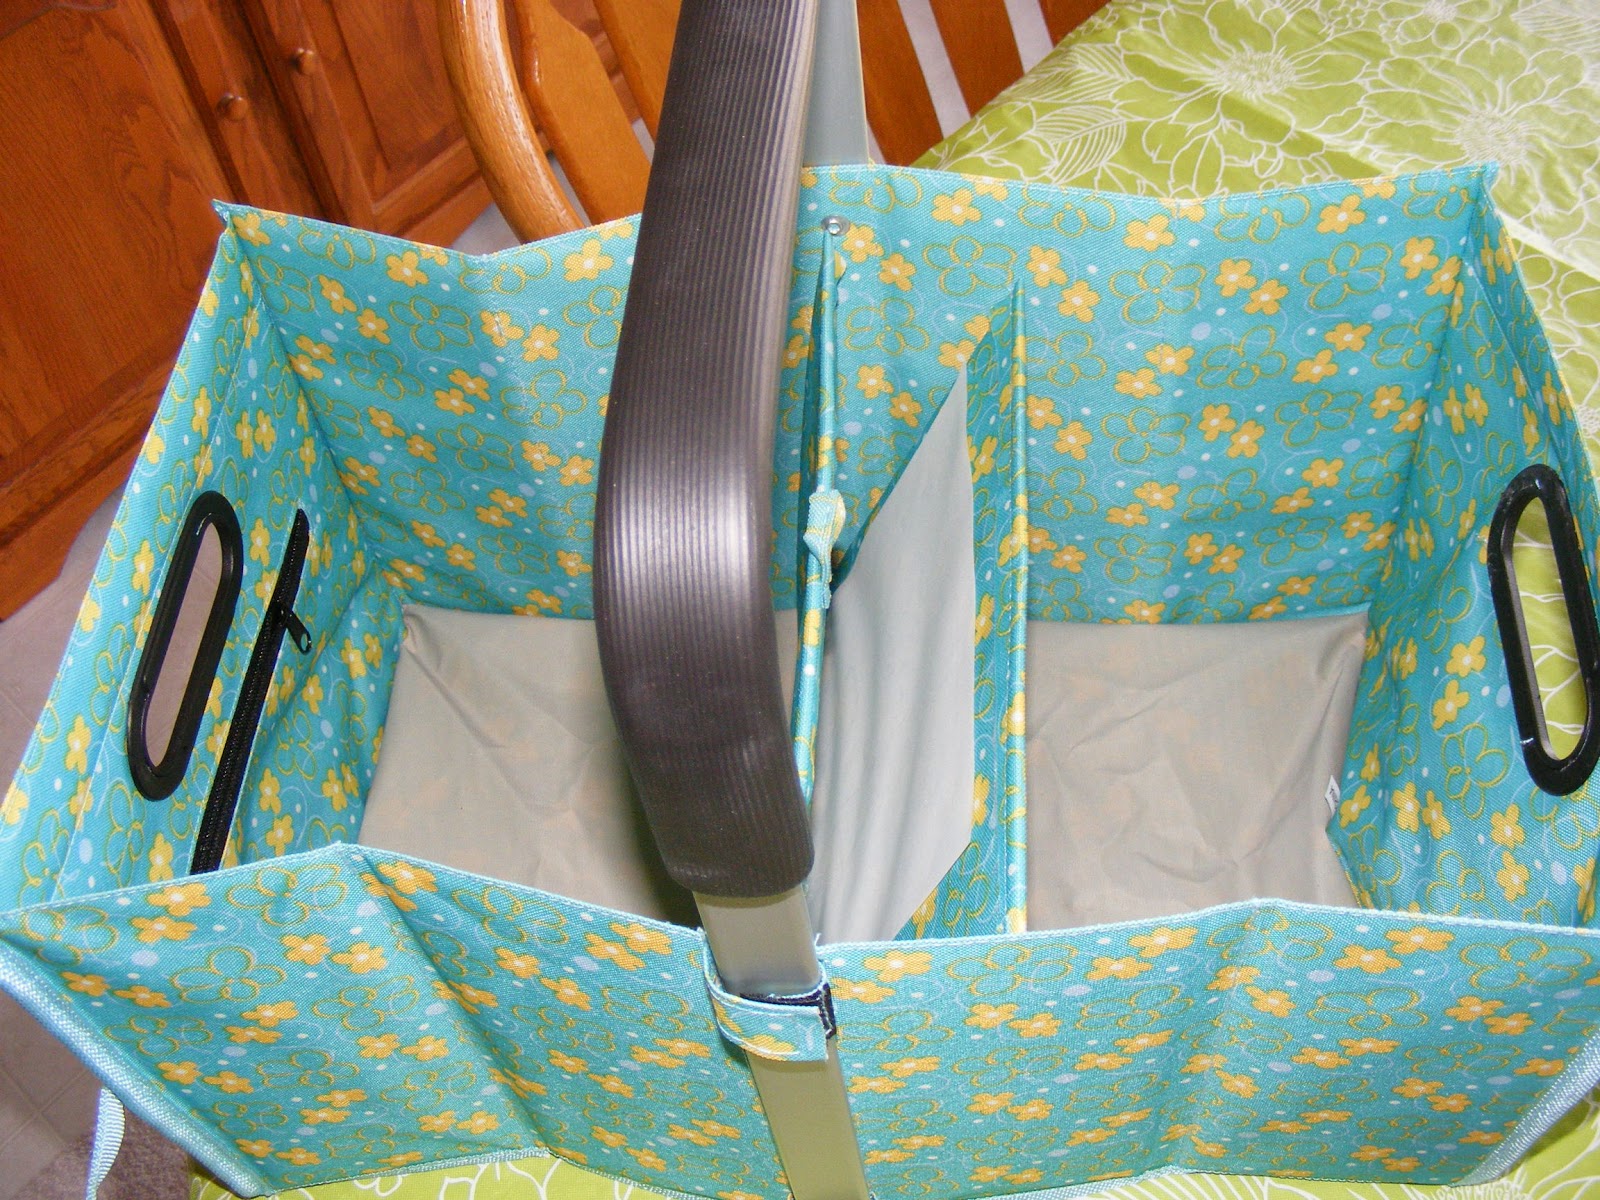
And the little beauty unfolds....

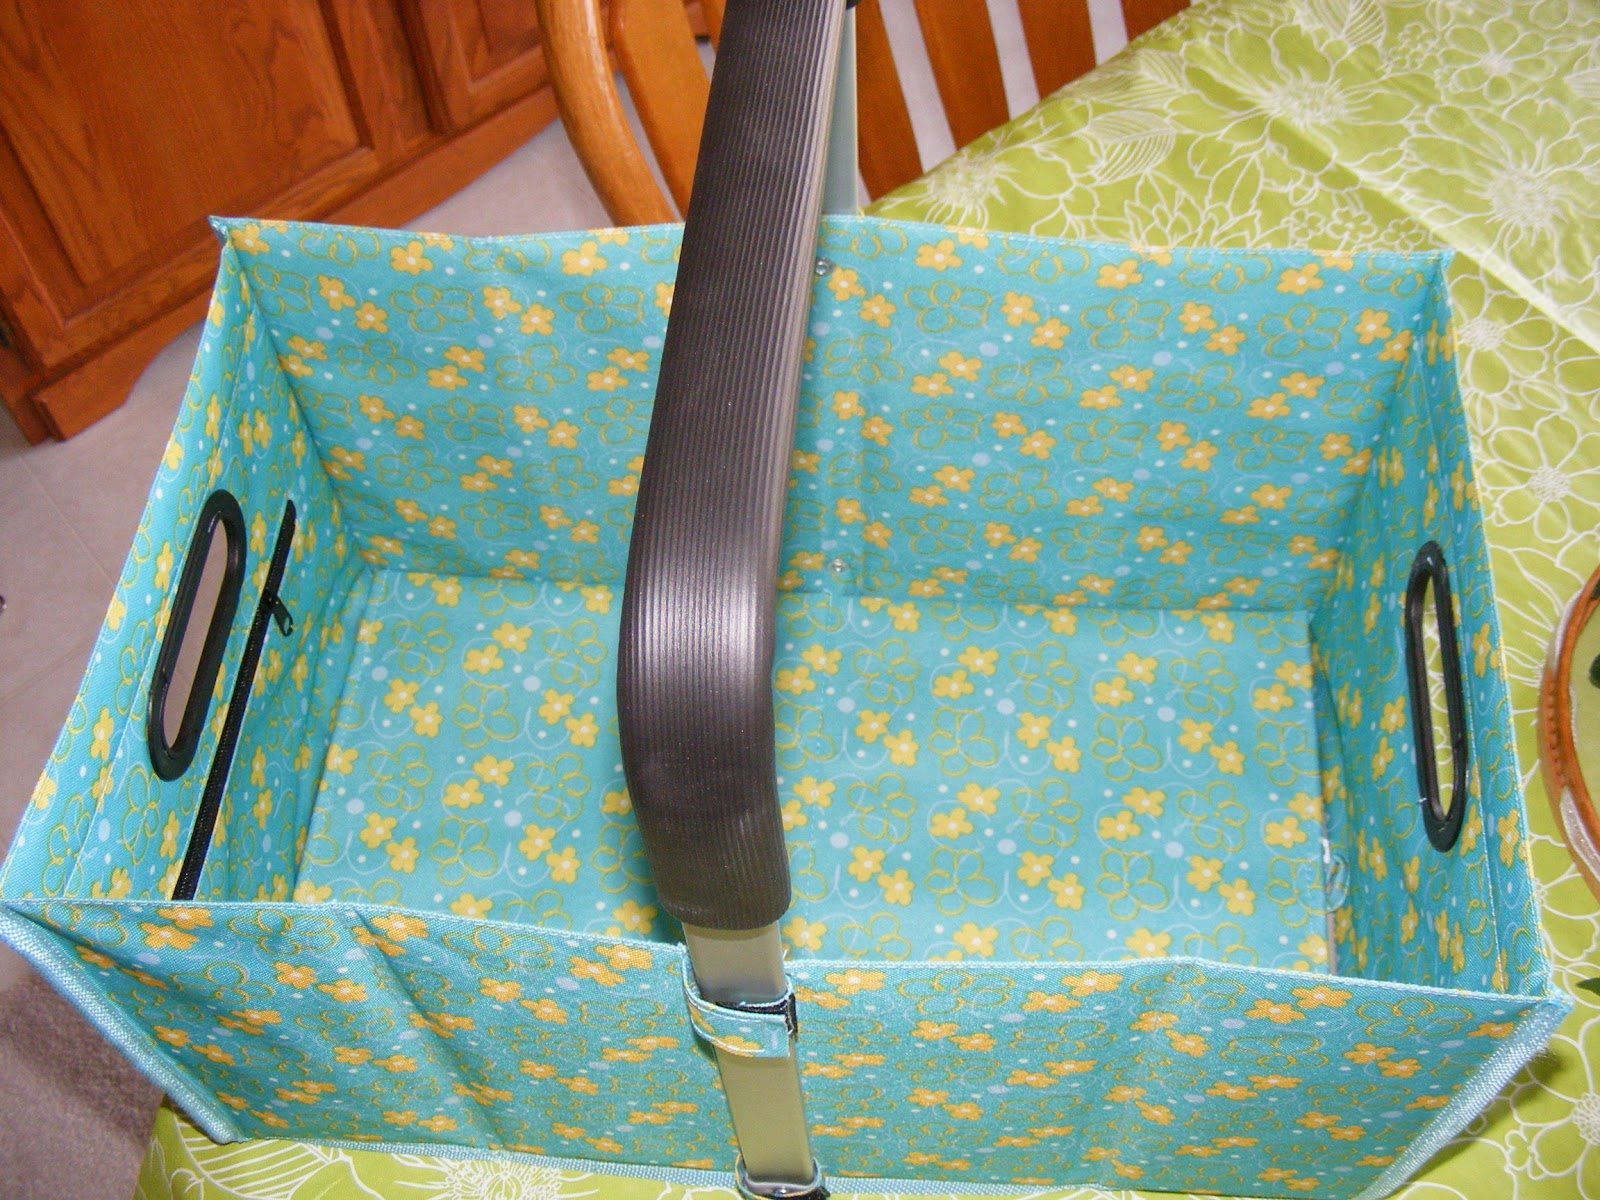
Til she looks like this!

Sturdy, beautiful, and so so roomy.

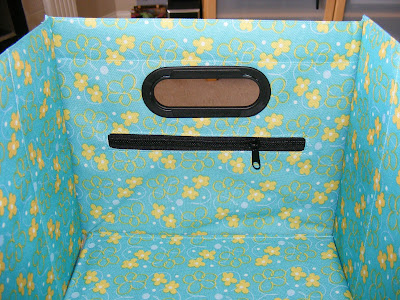
There's even a little zippered pocket for small, important things such as money or jewelry.  

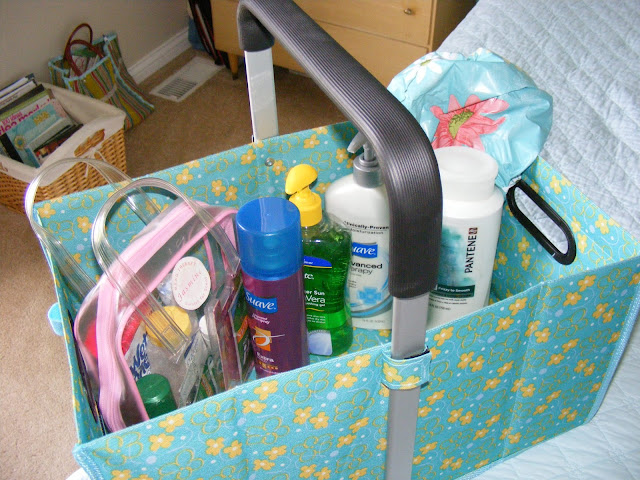
I bought this tote specifically for taking toiletries on road trips.  I like to take all my comforts from home and they are tall and bulky.


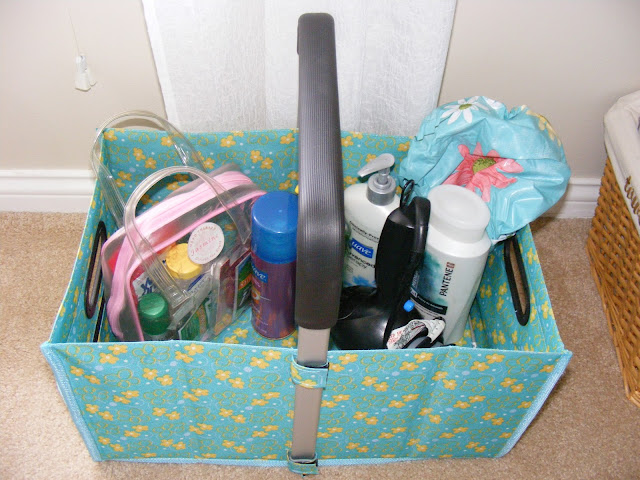
Wow...OTC meds, toiletries, and my blow dryer are already in and there is still plenty of room for my makeup bag.

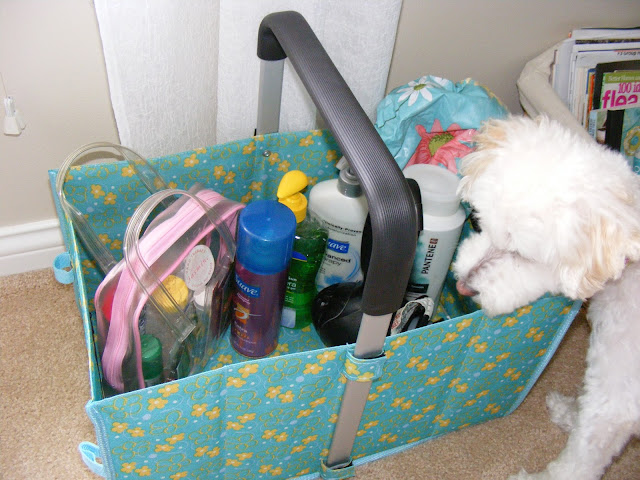
Gracie, our dog, approves!

I love it!  Right now, she is storing vintage books in our bedroom.  She's too cute to put away in between trips.  :)  She'd be great for toting craft projects, baby supplies, and more.
Girls, this is a great gift idea for the holidays!  I hope Sam's Club still has them!

Thanks for stopping by!


Blessings,
Donna

Linky Parties:

Tuesday, September 20, 2011

Felt Pumpkin

I've been a busy girl.  Making little felt quiet book pages for my etsy shop, Perfect Darlings.  So much fun!

I am making 10 or more page designs and my customers can chose any 5 of them for a custom felt book for their favorite little people.
This pumpkin page is one of my favorites, and I'd like to talk you through how to make one of these with felt or paper.  You could put the pumpkin on a pillow cover and have some new fall decor.  Or use paper and make this for the front of a greeting card.  The possibilities are endless!

This sweet little gourd is made with 3 identically-sized orange ovals.  So using a stencil or template, make a paper pattern of the size oval you want.  Next, using the pattern, cut out three ovals of felt, fabric, or paper.  Put 2 of them side by side or overlapping each other a bit, then the third one goes on top.  You can hand sew the ovals to your felt or fabric...or you can glue them if they are paper.  The stem is just hand cut without a pattern.  Now for the vine tendrils.  I used a green embroidery thread, all 6 strands together.  I sewed them onto the stem, leaving the ends of the thread unknotted and loose for the tendrils.  Then using paper to cover the pumpking for protection, I dipped my finger in mod podge, coated the thread, and wrapped the thread around a pencil.  Do that for the other one as well.  Let dry for a few minutes, then carefully slide the pencil out of your curly thread.  If it does not stay nicely in a coil, you can wet the thread with a drop of water and try it again.  Once you have the tendrills coiled, just let them dry.  When fully dry you can pull on them a bit til they are loose curls.  So so cute and the 3D aspect adds alot to the outcome.  

Wouldn't this make a cute piece of wall art, mounted on a mat and framed?  Or you could cut out a piece of felt the right size and shape to be the back of the pumpkin, sewing the front and back together with a bit of stuffing in the middle.  Let me know if you make this pumpkin and how it turns out!  I'm pretty sure I'll be making one for my house.  Cute, chubby pumpkins are darling!

Blessings!


Donna
Linky Parties:

Thursday, September 15, 2011

Miniature Jar Candles Become Spice Jars

Have you tried those little $1 jar candles from Walmart?  Love! Them!  The price is great, so I don't feel like I have to be stingy with how long I burn it.  I love that they are in cute little jars.  And they have a nice fragrance.  Well, when you are finished with them, you can remove the wax, wash them well, and they become GREAT little spice jars!

To remove the wax while it is still alittle bit soft, cut the remaining wax disc at the bottom into 4 pieces and pop them out.  Or pop the whole jar into the freezer for an hour, and the frozen wax is easy to pop out, break apart, and remove.  Then hot water and dish soap will remove the remaining residue.

This week I needed Pumpkin Pie Spice.  And as usual, I didn't have any...this happened to me last fall too.  So I googled a recipe for making your own, put those 4 ingredients together, and popped them into an empty candle jar.  Our label maker was handy and quick, so I made a label and now I have enough for the whole season!  Wouldn't this make a cute gift?

These jars are wide mouthed, so it is easy to scoop out the needed measurement of each spice.  And if you feel crafty, go ahead and print out some labels on your computer, mat them on cute scrapbook paper, and attach with a neat slice of clear packing tape over it all.

You can easily see when it's time to stock up on a spice, too!

Did you know that pumpkin pie spice is just cinnamon, allspice, ginger, and nutmeg?  I figure I saved several dollars by making it myself at home.

The little jar to the right that contains cilantro is one I probably bought at Hobby Lobby.  But actually I prefer these 'free' jars for their size, shape, and easy lid removal.  So from now on I'll be accumulating them til I have all that I need for the spices of which I keep larger amounts.  I need one for my large stash of dried rosemary next.
There are good recipes online for homemade steak seasoning too.  It would look so savory in a jar, and with a cute label would make such a fun gift or party favor.

Can't wait to pick out my next new $1 candle at Walmart!  Something spicy and fall-ish, for sure.

Thank you so much for stopping by!

Blessings!
Donna

Linky Parties:

Monday, September 12, 2011

A Fun Little Cloche

Sometime this past summer I saw a new-to-me-idea that was so cute and easy. I've been enjoying this new piece of decor, and see lots of possibilities for changing it up for each season. If I knew where I first saw this online, I would be glad to give them the credit...but of course, I don't have a clue!


And here it is!  This is a large candleholder that I made by gluing a glass candlestick to the bottom of a glass candle holder...both of the glass pieces were from the Dollar Store.  I have 2 of these, and have used them on my mantel with seasonal fillers and candles.  But what a cool change up to turn it upside down and use it as a cloche for a little display!

I decided to put a little crocheted doily on the bottom, then a vintage tape measure all rolled up, a vintage hook and eye card standing in the back, and 3 vintage wooden spools of thread pyramided on top of it all!

On the top of the display there is room for a tea light candle or some other little treasure.  I put one of the tulle wrapped party favors that I made for my mom's 70th b-day luncheon, which you can view HERE.

It's the cutest little display...made from things I already had...and won't it be fun to put a miniature pumpkin, some leaves, and acorns in this for fall?  With some little fallish treasure on top...maybe a pumpkin scented tea light.

Thanks for stopping by!  Your comments always make me smile!

Blessings!
Donna
Linky Parties:
Tip Junkie

Friday, September 9, 2011

A Perfect Darlings Facebook Drawing

Vintage things.  Retro things.  Children's things.  Vintage inspired things.  And free shipping!  These are what you will find at my Perfect Darlings Etsy Shop.


I've started a facebook page for my etsy shop, and am looking for 50 new followers there.  Please check it out, and join my page to be automatically entered into my drawing.  When 50  fine folks have 'LIKED' my Perfect Darlings facebook page, I will have a drawing for a prize from my shop.  :)


Please follow this link:  Perfect Darlings


Thank you for stopping by!  Blessings all over you today!


Donna

Tuesday, September 6, 2011

Bits of Bliss

I've been thinking, once again, about the simple joys God gives us in life.  Like my Morning Glories with new blooms each morning.  His mercies are new every morning.

Or the little Hummingbird that visited my flowers while I ate breakfast on the back porch.

How about this sweet saying on the door of our friends Tom and Bronwyn...cutest couple in town!

And their darling son's first b-day party.

I love it when a tiny little creature like this guy surprises me when I water my flowers.

And when God gives me a cute new craft idea...part of a new children's toy coming to my etsy, Perfect Darlings, soon!

And I L O V E my new Butter Bell!  Wanted one forever.  But they are expensive.  And the one I ordered from Amazon came broken.  So when I found this  one at Function Junction for about $8, I was smitten.  It works great and looks cute too!

Also enjoying my 'new' kitchen utensil holder...a vintage milk glass vase from the thrift store.

Bliss includes a sweet, sun-kissed apple at our nearby orchard.

And two bags of fresh picked Golden Delicious apples as well as the family fun of picking them together.

And lastly, a fresh new bit of September decor on our kitchen table.  Apples.  WITH the leaves still attached.  Cute, cute, cute.

What are your bits of bliss this week?  Stop to smell the apples, see the humming birds, and start that new little craft this week.  All are gifts from our Amazing Creator.

Blessings and Bliss!

Donna


Linky Parties:

Saturday, September 3, 2011

Travel Gadget Organizer from a Tea Towel

In July, JoAnn Fabrics had their summer line of things marked down to about 70% off.  I always have my eye open for cute tea towels, as they are a nice sized, already-hemmed, sturdy piece of fabric...just right for a little project like a pillow cover, or this!

Martha Stewart had emailed me this cool idea for creating a gadget organizer out of a tea towel...wasn't that nice of her?! :) This towel was just right for this project.

It's super easy, just requiring a few straight lines of stitching...ready?  Ok, I hope you can see from the photo how it is  folded.  You fold the bottom of vertically-laid towel up about 2/3 of the way, then fold it down, and up again...letting the first fold show alittle bit under the second fold.  This is kind of like an accordian pleat.  It will create 2 layers of pockets.

Next use a ruler and a disappearing ink fabric pen to mark off your pockets.  I wanted four equal sized pockets across, but you can customize it for your needs.

My pockets were all about 4 inches wide.

Since I was dealing with a large plaid, I had to try to keep my plaid lines straight, even though my towel wasn't really 'square'.  I sewed the two outside seams first.  Then the middle seam, and lastly the two outer pocket seams.  

Sew super easy!  (Pun?  Yes!)  When I travel I tend to forget which bag I put my camera cord in, or my ear buds.  With this organizer I have a go-to place for those items as well as extra batteries, my phone charger, bluetooth charger, etc!  I took it on my next trip, and it really was a help.  Yay!

Can you see that the pockets are staggered?  The first set of pockets are alittle higher than the second set, so that I can easily see what is in the top set and the bottom set.

I fold it into thirds and tie it with a gross grain ribbon.  I'd like to attach a tie permanently, but haven't taken that step yet.

Thanks for stopping by!!  Your comments and visits are always greatly enjoyed!

Blessings,
Donna

Linky Parties:
My Romantic Home
Tater Tots and Jello
Making Mondays Marvelous
Sew Darn Crafty
Made By You Mondays
Tip Junkie
More the Merrier Monday
Sundae Scoop
Sunday Showcase
07 08 09 10
Pin It button on image hover